Using MicroPython to Control Robotics Projects
MicroPython allows you to control robotics projects with ease, offering powerful Python capabilities on microcontrollers like the BBC micro.
Vinay
8/12/20247 min read
Introduction: MicroPython is a powerful, yet lightweight implementation of Python, designed to run on microcontrollers. It opens up exciting opportunities for hobbyists and professionals alike to build and control robotics projects with ease. In this blog, we’ll explore how MicroPython can be leveraged for robotics, focusing on its use with popular microcontrollers like the BBC micro.
Why MicroPython for Robotics?
Python is widely known for its simplicity and readability, making it an excellent choice for beginners and experienced developers alike. MicroPython brings these benefits to microcontrollers, offering a full-featured Python environment on small devices. Here’s why it’s particularly suitable for robotics:
Ease of Use: With Python’s syntax and structure, writing code for robots becomes more accessible and less error-prone.
Wide Hardware Support: MicroPython supports various microcontrollers, including the BBC micro, ESP8266, and Raspberry Pi Pico, making it versatile for different robotics projects.
Rich Libraries: MicroPython comes with a wide range of libraries for handling hardware interfaces like I2C, SPI, and PWM, which are essential in robotics.
Getting Started with MicroPython on the BBC micro
The BBC micro is a compact, affordable microcontroller,
perfect for robotics projects. It comes with built-in sensors,
a display, and buttons, making it an excellent platform for
experimentation.
Step 1: Setting Up MicroPython on the micro
Before you begin coding, you’ll need to set up your micro for MicroPython:
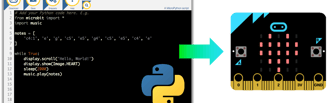
Install Mu Editor: Mu is a simple Python editor that supports MicroPython. Download and install Mu from here.
Connect the micro: Plug your micro into your computer via USB. Mu should automatically detect it.
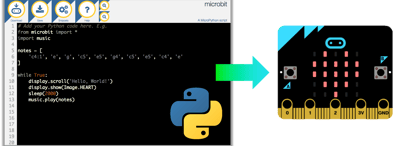
Write Your First Program: Open Mu, select the “BBC micro" mode, and start writing your MicroPython code.
Step 2: Basic Robotics Control with MicroPython
Let’s create a simple example where we control a robot’s movement using the BBC micro. Assume we have a basic robot chassis with two motors connected to the micro’s GPIO pins via a motor driver.
Connecting the Hardware:
Motor A: Connect the motor driver inputs (e.g., IN1, IN2) to micro’s GPIO pins (e.g., pin0 and pin1).
Motor B: Connect the motor driver inputs (e.g., IN3, IN4) to micro’s GPIO pins (e.g., pin2 and pin8).
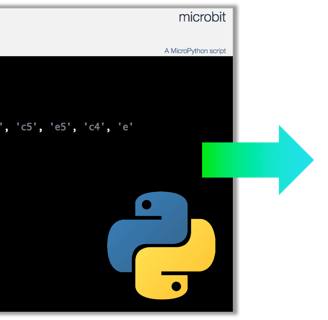
MicroPython Code: Here’s a simple script to control the robot’s movement.
from microbit import *
# Define motor control pins
motor_a_forward = pin0
motor_a_backward = pin1
motor_b_forward = pin2
motor_b_backward = pin8
def move_forward():
motor_a_forward.write_digital(1)
motor_a_backward.write_digital(0)
motor_b_forward.write_digital(1)
motor_b_backward.write_digital(0)
def move_backward():
motor_a_forward.write_digital(0)
motor_a_backward.write_digital(1)
motor_b_forward.write_digital(0)
motor_b_backward.write_digital(1)
def stop():
motor_a_forward.write_digital(0)
motor_a_backward.write_digital(0)
motor_b_forward.write_digital(0)
motor_b_backward.write_digital(0)
while True:
if button_a.is_pressed():
move_forward()
elif button_b.is_pressed():
move_backward()
else:
stop()
How It Works:
Button A Pressed: The robot moves forward.
Button B Pressed: The robot moves backward.
No Button Pressed: The robot stops.
Step 3: Expanding Your Robotics Project
Now that you’ve got the basics down, you can expand your project by adding more functionality and complexity. Here are a few ideas:
3.1 Adding Sensors
You can connect various sensors to the micro to make your robot more intelligent. For example, add an ultrasonic sensor to detect obstacles:
from microbit import *
import time
# Ultrasonic sensor pins
trig = pin13
echo = pin14
def measure_distance():
trig.write_digital(1)
time.sleep_us(10)
trig.write_digital(0)
duration = echo.read_digital()
distance = duration * 0.0343 / 2
return distance
while True:
distance = measure_distance()
if distance < 10:
stop()
else:
move_forward()
3.2 Line Following
Create a line-following robot by attaching IR sensors to detect the line on the ground:
# Assuming left_sensor is pin15, right_sensor is pin16
def line_follow():
left = pin15.read_digital()
right = pin16.read_digital()
if left == 0 and right == 1:
turn_left()
elif left == 1 and right == 0:
turn_right()
else:
move_forward()
while True:
line_follow()
Step 4: Exploring Advanced Robotics with MicroPython
Once you’re comfortable with basic control, you can dive deeper into more advanced robotics concepts using MicroPython:
PID Control: Implement Proportional-Integral-Derivative (PID) control for more precise motor control.
Wireless Communication: Use Bluetooth or radio modules to control your robot wirelessly.
Robotic Arm: Build and control a robotic arm with servos, using MicroPython’s PWM capabilities.
One of the Best Platform to Learn BBC Microbit:
The Mumbai Coding Lab: designed for students of different age groups. Including Future Ready courses like ScratchJr & Scratch, Raspberry Pi,Microbit, Python, 3D printing, Arduino, Artificial Intelligence and Machine Learning & much more....,These hands-on robotics kits introduce students to robotics and coding concepts in a fun and accessible way, promoting creativity and experimentation.
The most important thing parents should look for while searching for robotics and coding schools is physical accessible distance and flexibility of physical one-to-one and online/virtual classes. At TMCL we are happy to offer both Physical one-to-one and Online classes as they prefer. Our Lab is located in Express Zone Mall in Malad East near Oberoi Mall.
Website Link: https://themumbaicodinglab.in/
The most important factor while choosing any after-school program like robotics and coding is affordability, the TMCL programs are easily affordable to anyone.
Conclusion
MicroPython offers a powerful yet accessible platform for controlling robotics projects, particularly when paired with microcontrollers like the BBC micro. Its ease of use and extensive library support make it ideal for beginners and experienced developers looking to bring their robotic creations to life. Whether you’re building a simple line-following robot or experimenting with more complex systems, MicroPython provides the tools you need to succeed in the fascinating world of robotics.
Introduction: MicroPython is a powerful, yet lightweight implementation of Python, designed to run on microcontrollers. It opens up exciting opportunities for hobbyists and professionals alike to build and control robotics projects with ease. In this blog, we’ll explore how MicroPython can be leveraged for robotics, focusing on its use with popular microcontrollers like the BBC micro.
Why MicroPython for Robotics?
Python is widely known for its simplicity and readability, making it an excellent choice for beginners and experienced developers alike. MicroPython brings these benefits to microcontrollers, offering a full-featured Python environment on small devices. Here’s why it’s particularly suitable for robotics:
Ease of Use: With Python’s syntax and structure, writing code for robots becomes more accessible and less error-prone.
Wide Hardware Support: MicroPython supports various microcontrollers, including the BBC micro, ESP8266, and Raspberry Pi Pico, making it versatile for different robotics projects.
Rich Libraries: MicroPython comes with a wide range of libraries for handling hardware interfaces like I2C, SPI, and PWM, which are essential in robotics.
Getting Started with MicroPython on the BBC micro
The BBC micro is a compact, affordable microcontroller,
perfect for robotics projects. It comes with built-in sensors,
a display, and buttons, making it an excellent platform for
experimentation.
Step 1: Setting Up MicroPython on the micro
Before you begin coding, you’ll need to set up your micro for MicroPython:
Install Mu Editor: Mu is a simple Python editor that supports MicroPython. Download and install Mu from here.
Connect the micro: Plug your micro into your computer via USB. Mu should automatically detect it.
Write Your First Program: Open Mu, select the “BBC micro" mode, and start writing your MicroPython code.
Step 2: Basic Robotics Control with MicroPython
Let’s create a simple example where we control a robot’s movement using the BBC micro. Assume we have a basic robot chassis with two motors connected to the micro’s GPIO pins via a motor driver.
Connecting the Hardware:
Motor A: Connect the motor driver inputs (e.g., IN1, IN2) to micro’s GPIO pins (e.g., pin0 and pin1).
Motor B: Connect the motor driver inputs (e.g., IN3, IN4) to micro’s GPIO pins (e.g., pin2 and pin8).
MicroPython Code: Here’s a simple script to control the robot’s movement.
from microbit import *
# Define motor control pins
motor_a_forward = pin0
motor_a_backward = pin1
motor_b_forward = pin2
motor_b_backward = pin8
def move_forward():
motor_a_forward.write_digital(1)
motor_a_backward.write_digital(0)
motor_b_forward.write_digital(1)
motor_b_backward.write_digital(0)
def move_backward():
motor_a_forward.write_digital(0)
motor_a_backward.write_digital(1)
motor_b_forward.write_digital(0)
motor_b_backward.write_digital(1)
def stop():
motor_a_forward.write_digital(0)
motor_a_backward.write_digital(0)
motor_b_forward.write_digital(0)
motor_b_backward.write_digital(0)
while True:
if button_a.is_pressed():
move_forward()
elif button_b.is_pressed():
move_backward()
else:
stop()
How It Works:
Button A Pressed: The robot moves forward.
Button B Pressed: The robot moves backward.
No Button Pressed: The robot stops.
Step 3: Expanding Your Robotics Project
Now that you’ve got the basics down, you can expand your project by adding more functionality and complexity. Here are a few ideas:
3.1 Adding Sensors
You can connect various sensors to the micro to make your robot more intelligent. For example, add an ultrasonic sensor to detect obstacles:
from microbit import *
import time
# Ultrasonic sensor pins
trig = pin13
echo = pin14
def measure_distance():
trig.write_digital(1)
time.sleep_us(10)
trig.write_digital(0)
duration = echo.read_digital()
distance = duration * 0.0343 / 2
return distance
while True:
distance = measure_distance()
if distance < 10:
stop()
else:
move_forward()
3.2 Line Following
Create a line-following robot by attaching IR sensors to detect the line on the ground:
# Assuming left_sensor is pin15, right_sensor is pin16
def line_follow():
left = pin15.read_digital()
right = pin16.read_digital()
if left == 0 and right == 1:
turn_left()
elif left == 1 and right == 0:
turn_right()
else:
move_forward()
while True:
line_follow()
Step 4: Exploring Advanced Robotics with MicroPython
Once you’re comfortable with basic control, you can dive deeper into more advanced robotics concepts using MicroPython:
PID Control: Implement Proportional-Integral-Derivative (PID) control for more precise motor control.
Wireless Communication: Use Bluetooth or radio modules to control your robot wirelessly.
Robotic Arm: Build and control a robotic arm with servos, using MicroPython’s PWM capabilities.
One of the Best Platform to Learn BBC Microbit:
The Mumbai Coding Lab: designed for students of different age groups. Including Future Ready courses like ScratchJr & Scratch, Raspberry Pi,Microbit, Python, 3D printing, Arduino, Artificial Intelligence and Machine Learning & much more....,These hands-on robotics kits introduce students to robotics and coding concepts in a fun and accessible way, promoting creativity and experimentation.
The most important thing parents should look for while searching for robotics and coding schools is physical accessible distance and flexibility of physical one-to-one and online/virtual classes. At TMCL we are happy to offer both Physical one-to-one and Online classes as they prefer. Our Lab is located in Express Zone Mall in Malad East near Oberoi Mall.
Website Link: https://themumbaicodinglab.in/
The most important factor while choosing any after-school program like robotics and coding is affordability, the TMCL programs are easily affordable to anyone.
Conclusion
MicroPython offers a powerful yet accessible platform for controlling robotics projects, particularly when paired with microcontrollers like the BBC micro. Its ease of use and extensive library support make it ideal for beginners and experienced developers looking to bring their robotic creations to life. Whether you’re building a simple line-following robot or experimenting with more complex systems, MicroPython provides the tools you need to succeed in the fascinating world of robotics.