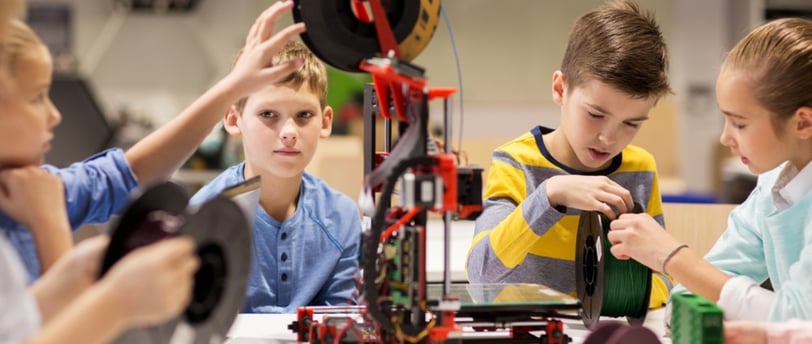
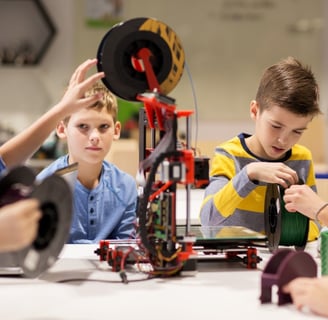
Incorporating 3D Printing in Robotics Projects
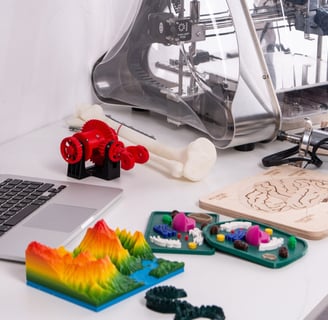
Discover how 3D printing can revolutionize your robotics projects by enabling custom part creation, enhancing functionality, and reducing costs. Learn about designing and printing parts, and explore example projects that benefit from this technology.
Vinay
5/25/20247 min read
Introduction:
This blog will explore how 3D printing can be leveraged to create custom parts for robotics projects, providing makers and advanced students with the knowledge and inspiration to enhance their creations. We'll cover the benefits of 3D printing, guide you through designing and printing custom parts, and showcase example projects that have successfully utilized 3D-printed components.
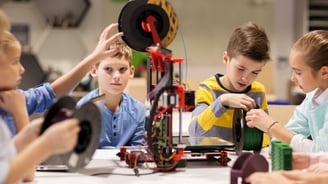
One of the Best Platform to Learn 3D printing:
The Mumbai Coding Lab: designed for students of different age groups. Including Future Ready courses like ScratchJr & Scratch, Raspberry Pi, Python, 3D printing, Arduino, Artificial Intelligence and Machine Learning & much more....,These hands-on robotics kits introduce students to robotics and coding concepts in a fun and accessible way, promoting creativity and experimentation.
The most important thing parents should look for while searching for robotics and coding schools is physical accessible distance and flexibility of physical one-to-one and online/virtual classes. At TMCL we are happy to offer both Physical one-to-one and Online classes as they prefer. Our Lab is located in Velentine Apartment Building in Malad East near Oberoi Mall.
Website Link: https://themumbaicodinglab.in/
The most important factor while choosing any after-school program like robotics and coding is affordability, the TMCL programs are easily affordable to anyone.
Conclusion:
By incorporating 3D printing into your robotics projects, you gain the ability to create highly customized, functional, and innovative parts. Whether you're designing a robotic arm, a wheeled robot, a drone, or sensor housings, 3D printing offers a world of possibilities that can significantly enhance your robotics endeavors. With the provided tutorials and examples, you're well-equipped to start integrating 3D printing into your projects and bring your robotic ideas to life.
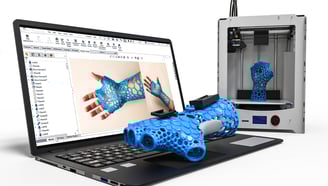
1. Benefits of 3D Printing in Robotics
3D printing has revolutionized the way we approach robotics projects. Here are some key benefits:
Customization: 3D printing allows you to create parts tailored to your specific needs. This means you can design and produce components that perfectly fit your robot's dimensions and functional requirements.
Cost-Effective: Traditional manufacturing methods can be expensive, especially for custom parts. 3D printing significantly reduces the cost, making it accessible for hobbyists and students.
Rapid Prototyping: You can quickly produce and test multiple iterations of a design, speeding up the development process and allowing for rapid problem-solving.
Complex Geometries: 3D printers can create complex shapes that are difficult or impossible to achieve with conventional manufacturing methods, opening up new possibilities for innovative designs.
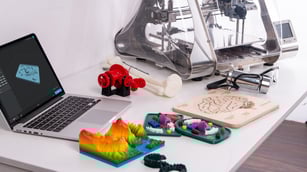
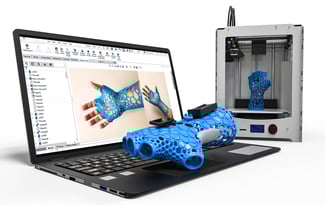
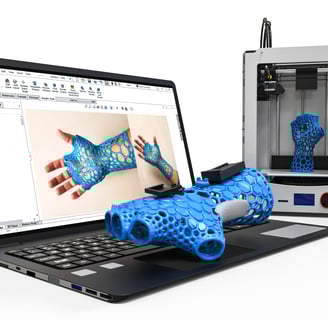
2. Designing and Printing Custom Parts
Creating custom parts for your robotics projects involves several steps:
a. Design:
CAD Software: Use Computer-Aided Design (CAD) software to create your parts. Popular options include Tinkercad for beginners and Fusion 360 for more advanced users.
Parametric Design: Consider using parametric design, where you define dimensions and relationships between parts that can be easily adjusted.
b. Materials:
PLA: A commonly used, biodegradable plastic that's easy to print with and works well for most non-structural parts.
ABS: A tougher plastic that's more heat-resistant, suitable for parts that need to withstand higher stresses or temperatures.
TPU: A flexible material ideal for creating parts that need to bend or compress.
c. Printing:
Printer Settings: Adjust your printer settings based on the material and part complexity. Common settings include layer height, infill density, and print speed.
Supports and Rafts: Use support structures for overhangs and rafts to improve bed adhesion if necessary.
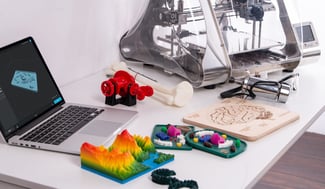
3. Example Projects and Tutorials
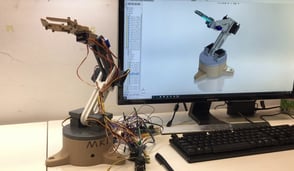
a. Robotic Arm:
Custom Joints and Grippers: Design and print joints that fit your servos perfectly. Create custom grippers tailored to the objects your robot will handle.
Tutorial: A step-by-step guide on designing and printing parts for a basic robotic arm, including CAD files and print settings.
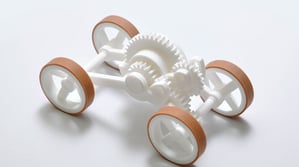
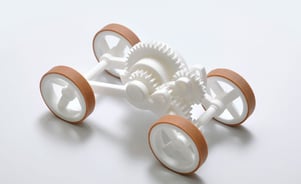
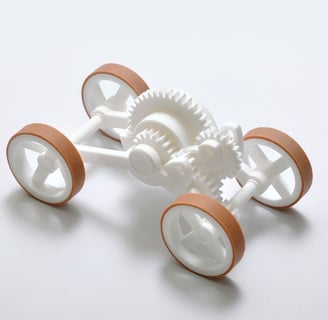
b. Wheeled Robots:
Chassis and Mounts: Print a custom chassis that houses your motors, battery pack, and control board snugly. Design mounts for sensors and cameras.
Tutorial: Building a 3D-printed chassis for a wheeled robot, with considerations for weight distribution and motor placement.
c. Drones:
Frames and Propeller Guards: Create lightweight yet sturdy frames and propeller guards that protect your drone during flight.
Tutorial: Designing a modular drone frame that can be easily customized & upgraded.
d. Sensor Housings:
Weatherproof Enclosures: Design enclosures for sensors to protect them from environmental factors.
Tutorial: Steps to create a weatherproof sensor housing, including sealing techniques and material choices.


Introduction:
This blog will explore how 3D printing can be leveraged to create custom parts for robotics projects, providing makers and advanced students with the knowledge and inspiration to enhance their creations. We'll cover the benefits of 3D printing, guide you through designing and printing custom parts, and showcase example projects that have successfully utilized 3D-printed components.
One of the Best Platform to Learn 3D printing:
The Mumbai Coding Lab: designed for students of different age groups. Including Future Ready courses like ScratchJr & Scratch, Raspberry Pi, Python, 3D printing, Arduino, Artificial Intelligence and Machine Learning & much more....,These hands-on robotics kits introduce students to robotics and coding concepts in a fun and accessible way, promoting creativity and experimentation.
The most important thing parents should look for while searching for robotics and coding schools is physical accessible distance and flexibility of physical one-to-one and online/virtual classes. At TMCL we are happy to offer both Physical one-to-one and Online classes as they prefer. Our Lab is located in Velentine Apartment Building in Malad East near Oberoi Mall.
Website Link: https://themumbaicodinglab.in/
The most important factor while choosing any after-school program like robotics and coding is affordability, the TMCL programs are easily affordable to anyone.
Conclusion:
By incorporating 3D printing into your robotics projects, you gain the ability to create highly customized, functional, and innovative parts. Whether you're designing a robotic arm, a wheeled robot, a drone, or sensor housings, 3D printing offers a world of possibilities that can significantly enhance your robotics endeavors. With the provided tutorials and examples, you're well-equipped to start integrating 3D printing into your projects and bring your robotic ideas to life.
1. Benefits of 3D Printing in Robotics
3D printing has revolutionized the way we approach robotics projects. Here are some key benefits:
Customization: 3D printing allows you to create parts tailored to your specific needs. This means you can design and produce components that perfectly fit your robot's dimensions and functional requirements.
Cost-Effective: Traditional manufacturing methods can be expensive, especially for custom parts. 3D printing significantly reduces the cost, making it accessible for hobbyists and students.
Rapid Prototyping: You can quickly produce and test multiple iterations of a design, speeding up the development process and allowing for rapid problem-solving.
Complex Geometries: 3D printers can create complex shapes that are difficult or impossible to achieve with conventional manufacturing methods, opening up new possibilities for innovative designs.
2. Designing and Printing Custom Parts
Creating custom parts for your robotics projects involves several steps:
a. Design:
CAD Software: Use Computer-Aided Design (CAD) software to create your parts. Popular options include Tinkercad for beginners and Fusion 360 for more advanced users.
Parametric Design: Consider using parametric design, where you define dimensions and relationships between parts that can be easily adjusted.
b. Materials:
PLA: A commonly used, biodegradable plastic that's easy to print with and works well for most non-structural parts.
ABS: A tougher plastic that's more heat-resistant, suitable for parts that need to withstand higher stresses or temperatures.
TPU: A flexible material ideal for creating parts that need to bend or compress.
c. Printing:
Printer Settings: Adjust your printer settings based on the material and part complexity. Common settings include layer height, infill density, and print speed.
Supports and Rafts: Use support structures for overhangs and rafts to improve bed adhesion if necessary.
3. Example Projects and Tutorials
a. Robotic Arm:
Custom Joints and Grippers: Design and print joints that fit your servos perfectly. Create custom grippers tailored to the objects your robot will handle.
Tutorial: A step-by-step guide on designing and printing parts for a basic robotic arm, including CAD files and print settings.
b. Wheeled Robots:
Chassis and Mounts: Print a custom chassis that houses your motors, battery pack, and control board snugly. Design mounts for sensors and cameras.
Tutorial: Building a 3D-printed chassis for a wheeled robot, with considerations for weight distribution and motor placement.
c. Drones:
Frames and Propeller Guards: Create lightweight yet sturdy frames and propeller guards that protect your drone during flight.
Tutorial: Designing a modular drone frame that can be easily customized & upgraded.
d. Sensor Housings:
Weatherproof Enclosures: Design enclosures for sensors to protect them from environmental factors.
Tutorial: Steps to create a weatherproof sensor housing, including sealing techniques and material choices.